This screen will allow you to view, add and remove images associated with a product within Power-Gx.
1. You may navigate to the Product Images screen via these menus, Gx Stock - Epower - Product Images. Alternatively you may
link to this screen from within Stock Product Details, on the Product Picture and Other Tab click on the Ecommerce Information Button,
this will display the Ecommerce Data screen. Towards the foot of this screen is a Product Images button, click it to go to this screen.
2. At the Product prompt type in the product code or alternatively use the Search button.
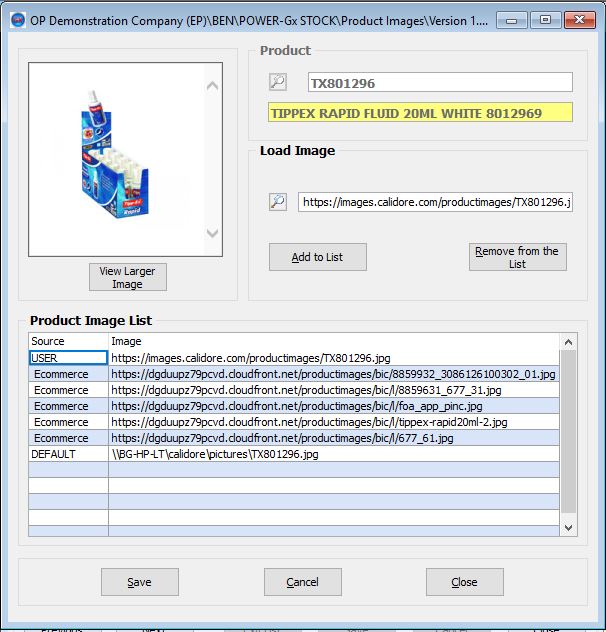
3. The screen will display a list of all the images associated with the product. The list, under the title
Product Image List, has a Source and a file path or URL to the image file. There are 3 Source Types,
USER - image has been loaded by a user;
Ecommerce - image URL belongs to third party Ecommerce data (for example Fusion Data);
DEFAULT - default image should none of the others exist. You may click on any image to view it.
4. To Add a new image to the list locate the Load Image prompt, click on the search button and
browse for the image file you wish to load. You may find it easier to locate the image file by copying it onto your own PC
or a network shared folder. Alternatively you may type/paste the URL of the image into the prompt (for example, https://ourwebsite.com/images/a_product.jpg).
5. To Remove an image select it from the list by clicking on it. The image's path will appear in the prompt,
click on the Remove from the List button to delete the association with the product.
Please note that the image file itself will not be deleted.